How to probe the periodontal chart
The periodontal chart is probed inside a consultation with the Consulta Odontológica template: six sites per tooth, typed on the keyboard, and the cursor moves on by itself. DeusRex calculates the clinical attachment level (CAL, shown as NIC), bleeding and plaque for the whole mouth and, when the mouth is complete, suggests the stage and grade according to the AAP/EFP 2017 classification. You confirm the diagnosis, and it is signed with the visit.
Before you start
- Your professional profile must have the Odontología or Ortodoncia specialty, and the consultation must be saved (write the Motivo de consulta and wait for Guardado).
- Teeth marked as Ausente in the odontogram are skipped automatically.
Probe
- In the consultation, scroll down to Periodontograma.
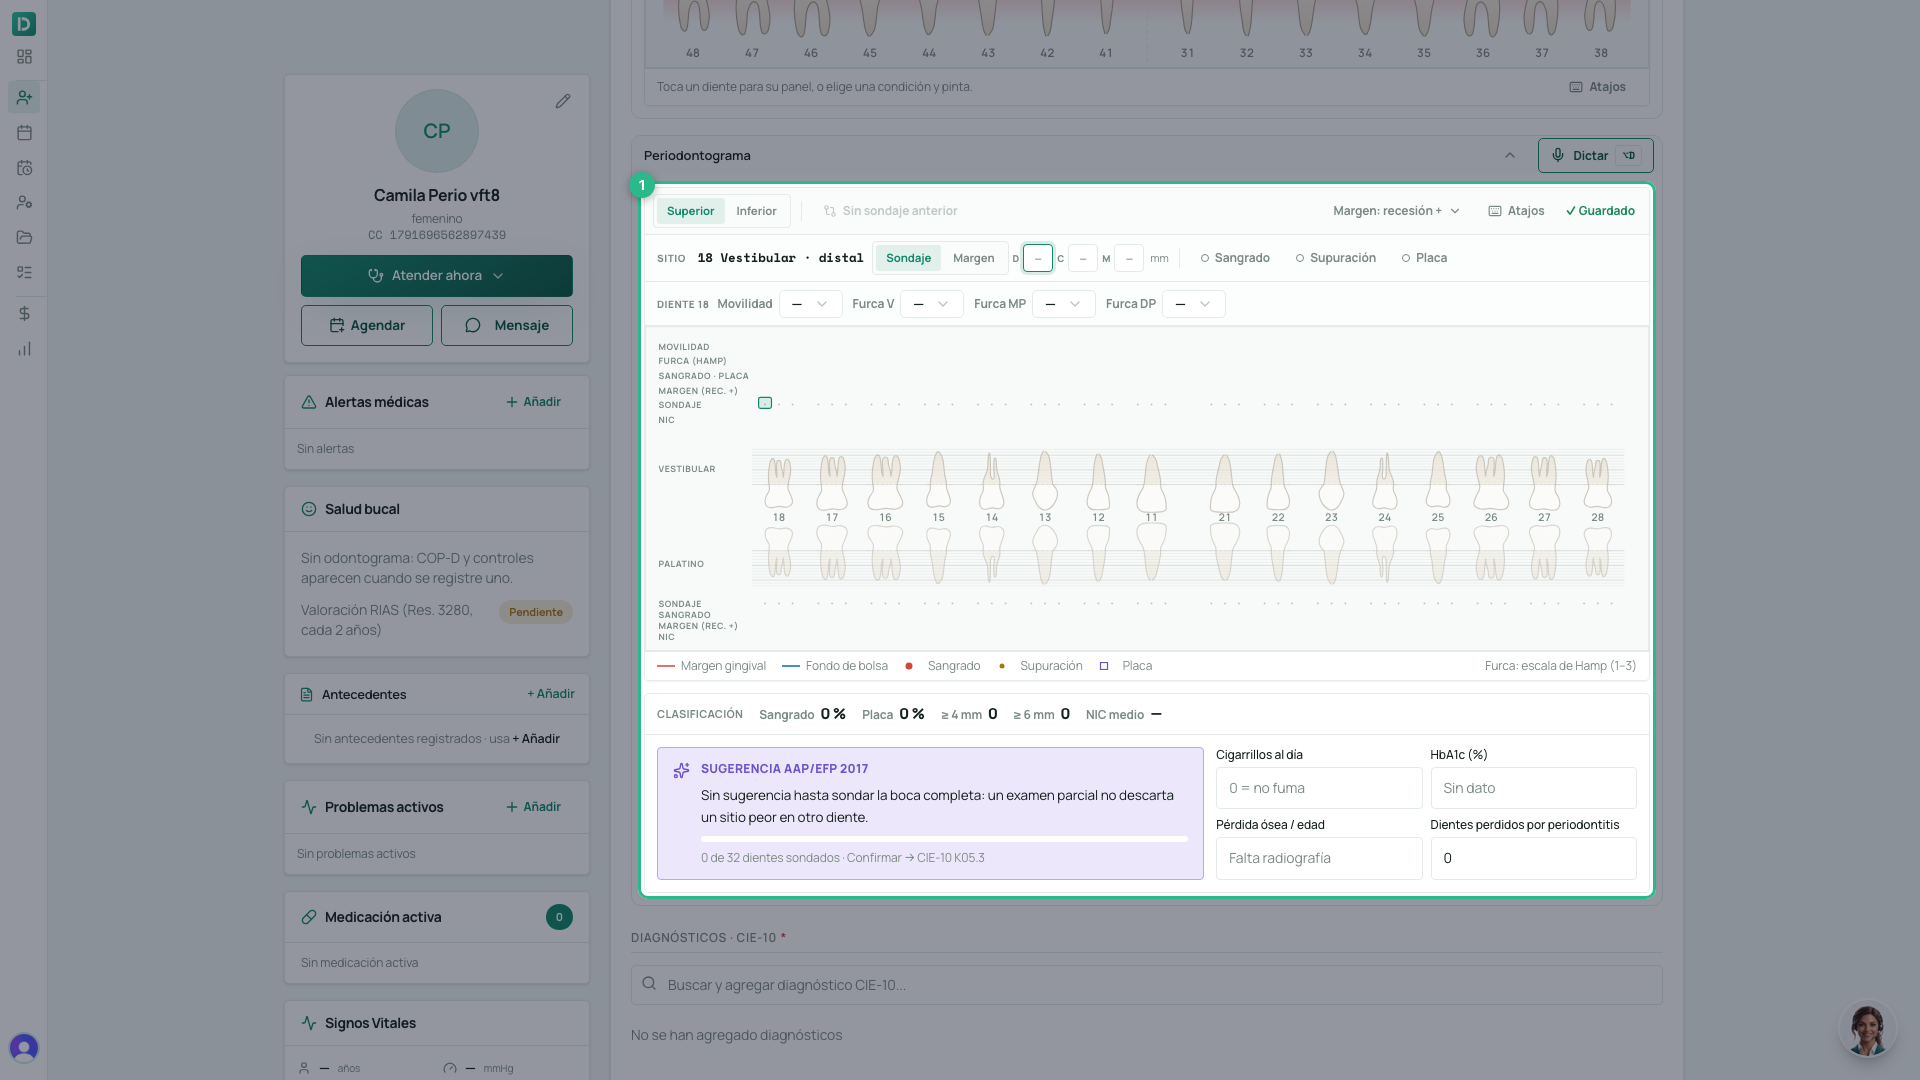
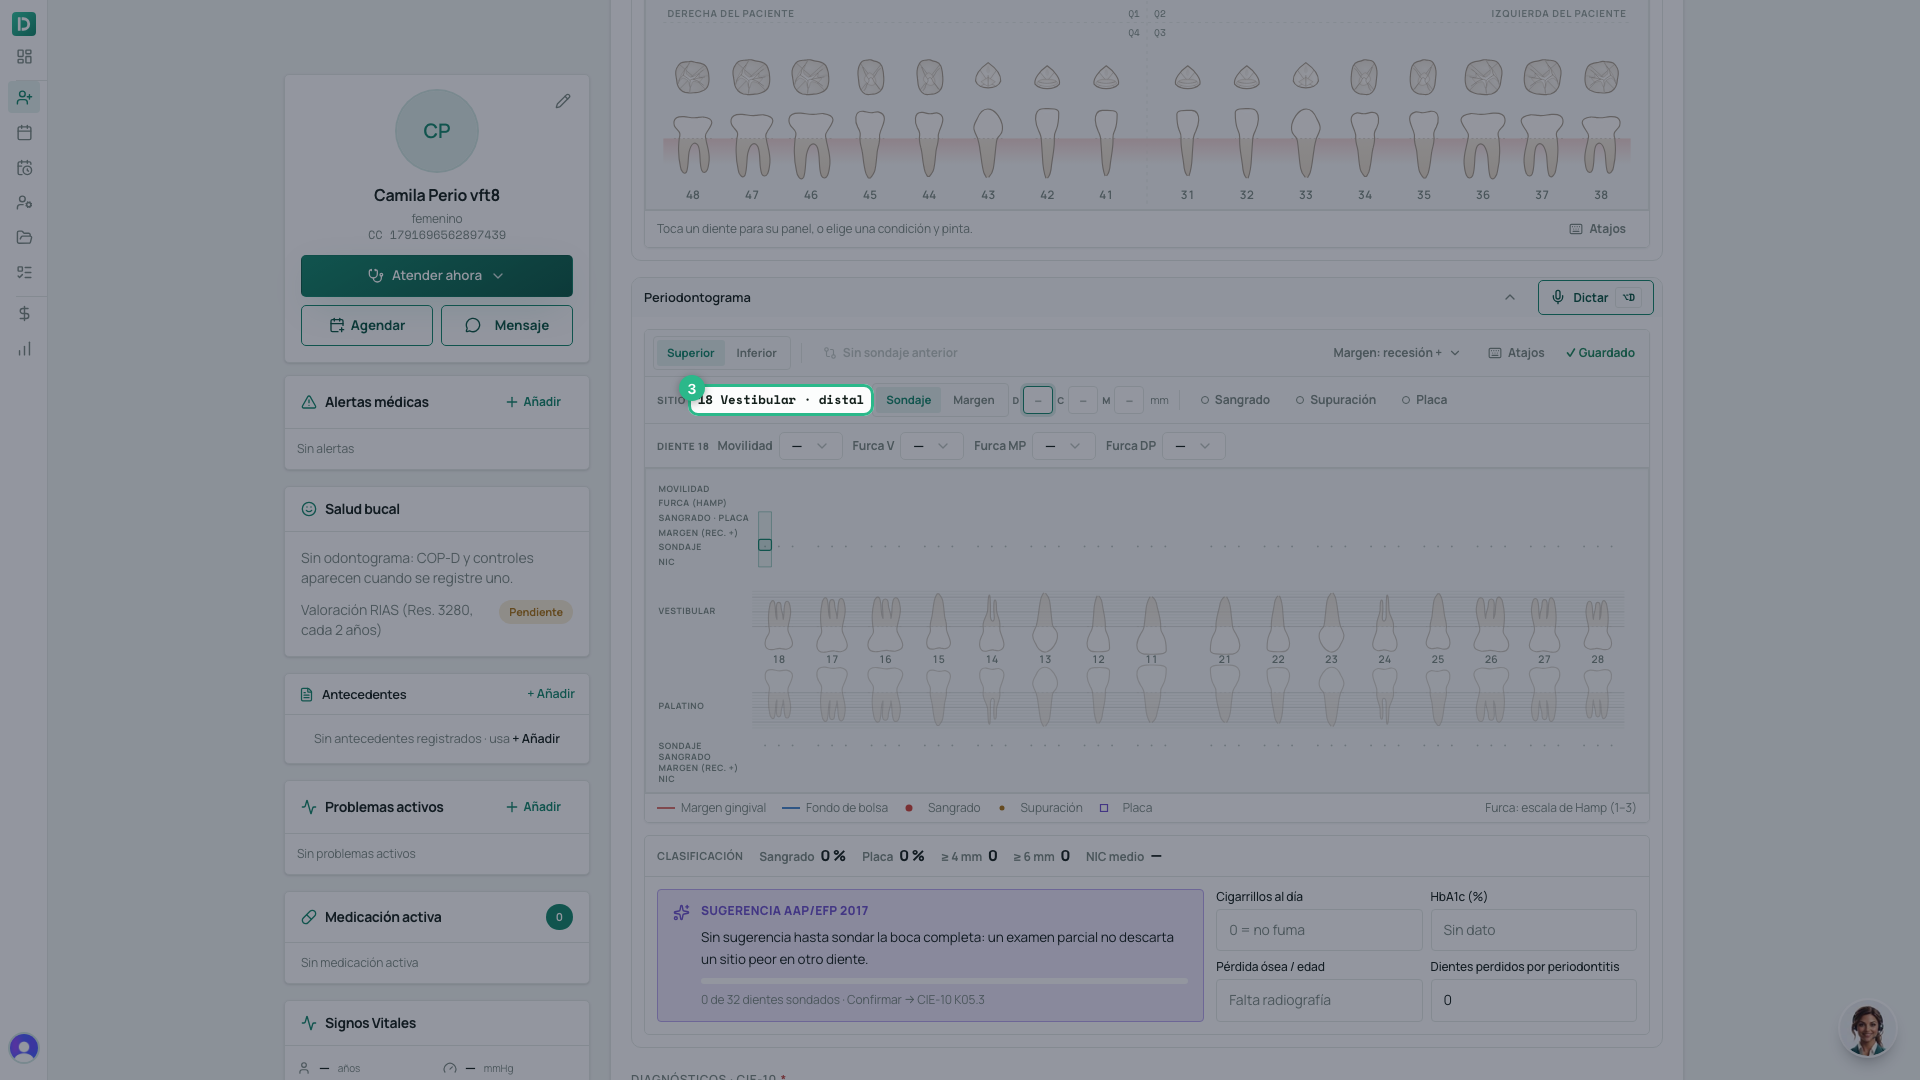
- Tap the first site: 18 vestibular, distal.
- Type the probing depth of each site, one digit per site (
⇧+ digit for 10–19). The cursor runs along the buccal side from left to right and comes back along the palatal side; the blue line draws the bottom of the pocket.
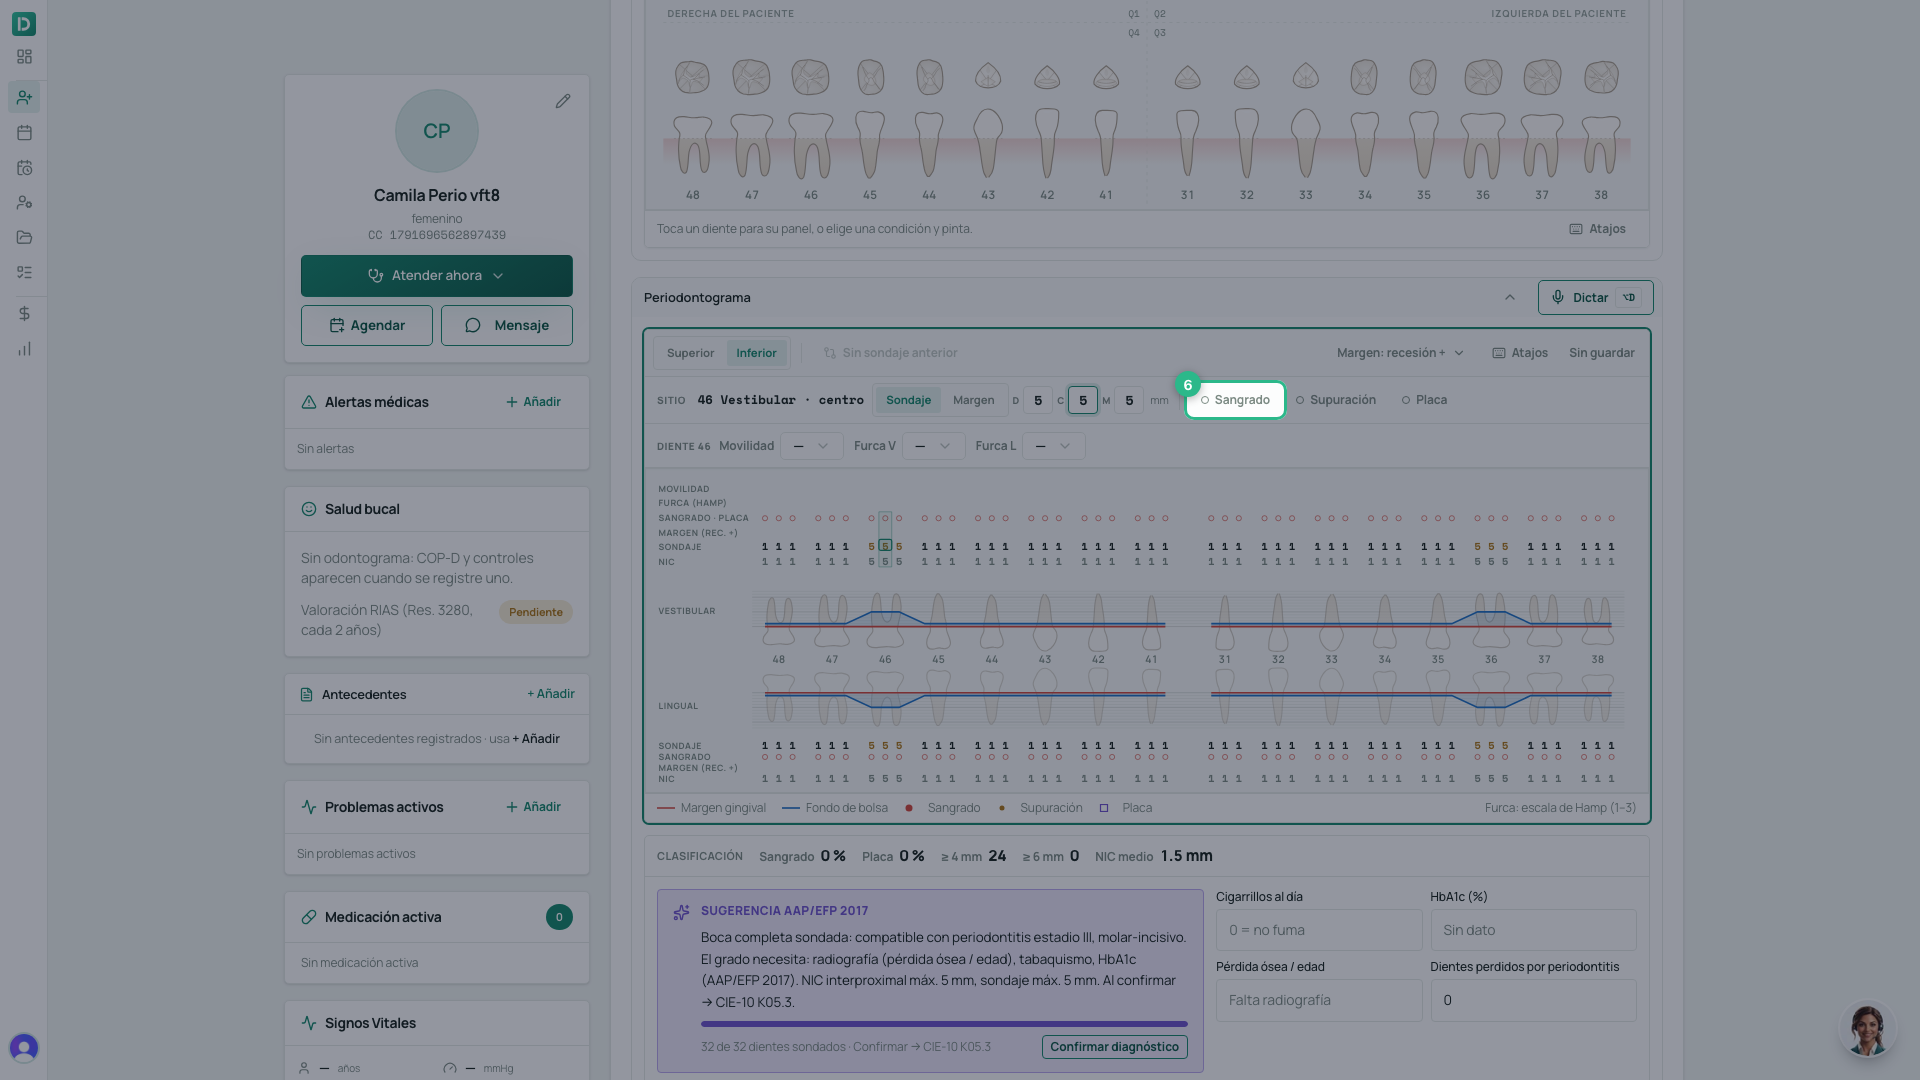
- Switch to the Inferior arch.
- Tap 48 vestibular, distal and type the lower arch the same way.
- To mark Sangrado (bleeding), tap the site and click Sangrado (or the
Skey). Supuración (suppuration,U) and Placa (plaque,P) work the same way.
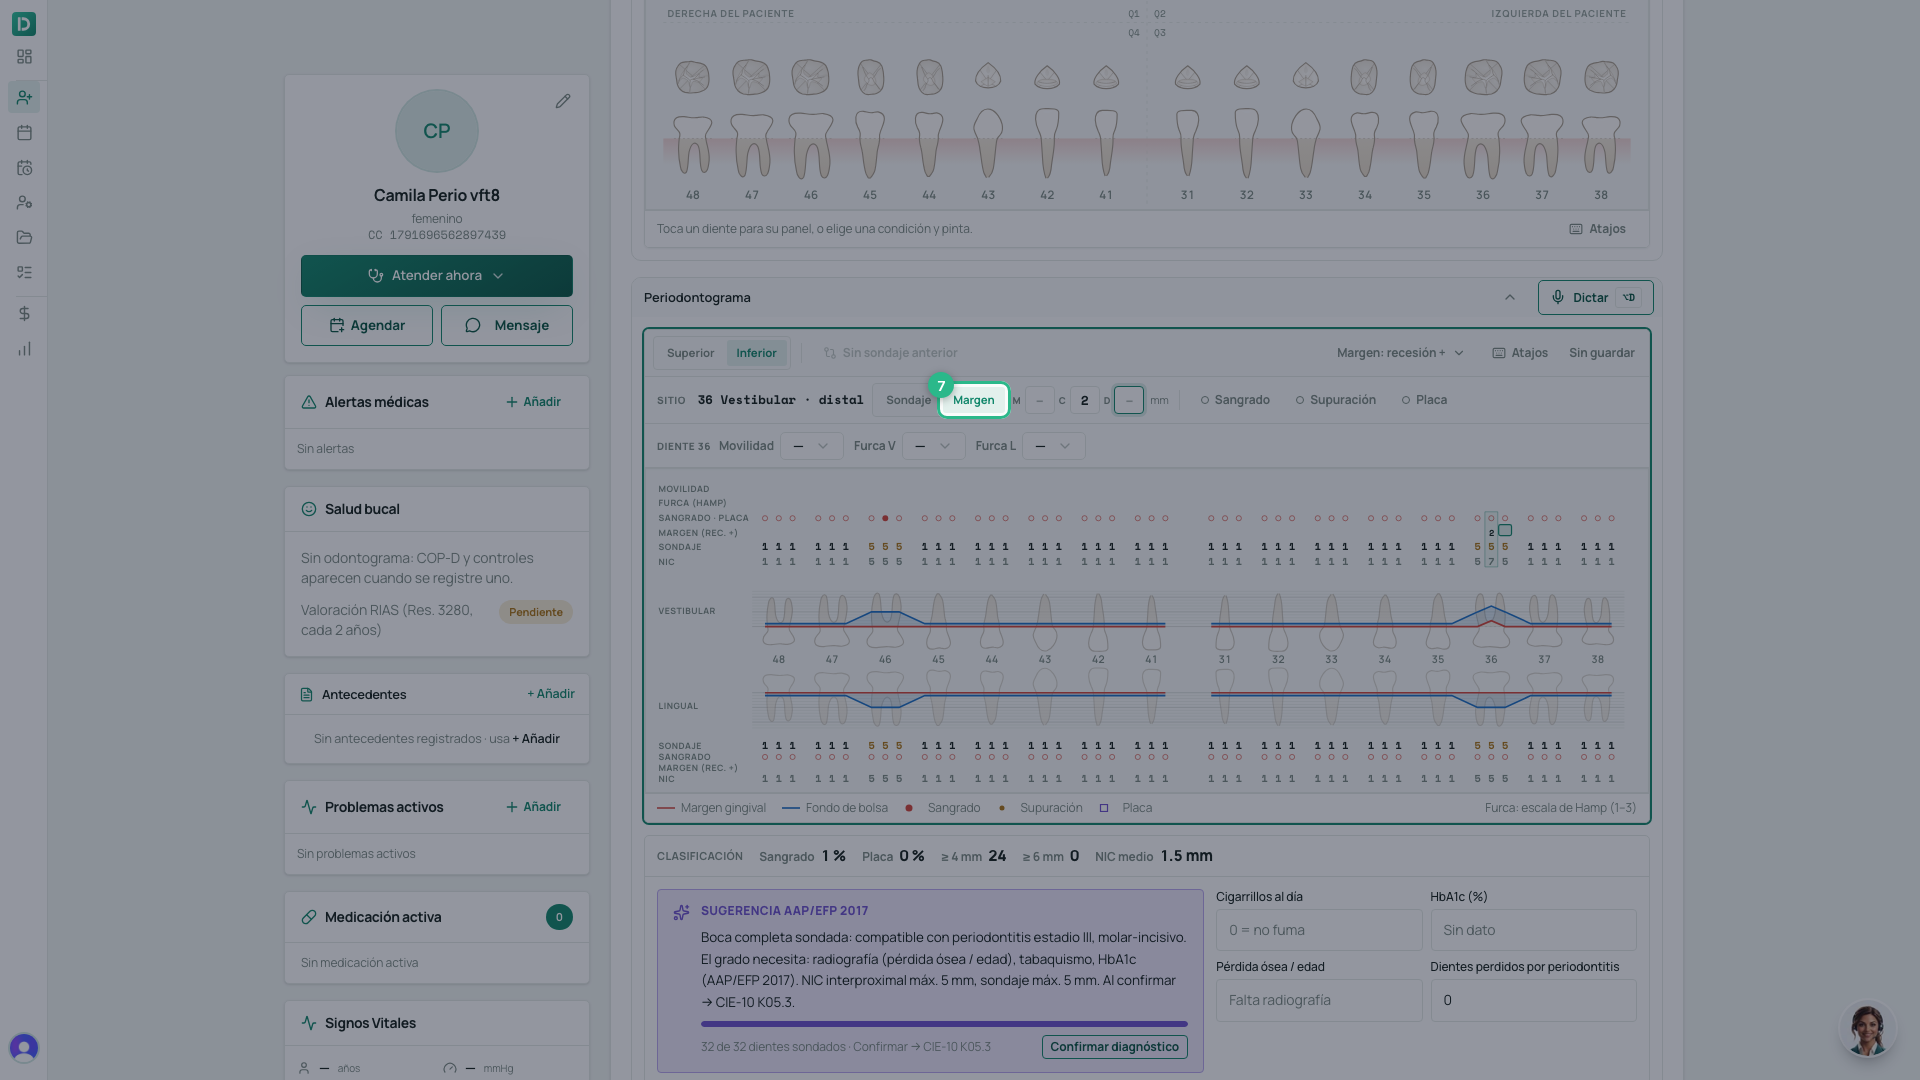
- For a recession, press
M(switches to Margen), type the millimetres and go back withM. The CAL (NIC) — probing depth plus recession — is calculated automatically.
Classify
- Enter the risk factors: cigarettes per day, HbA1c, bone loss relative to age and teeth lost to periodontitis. These are what define the grade (A, B or C).
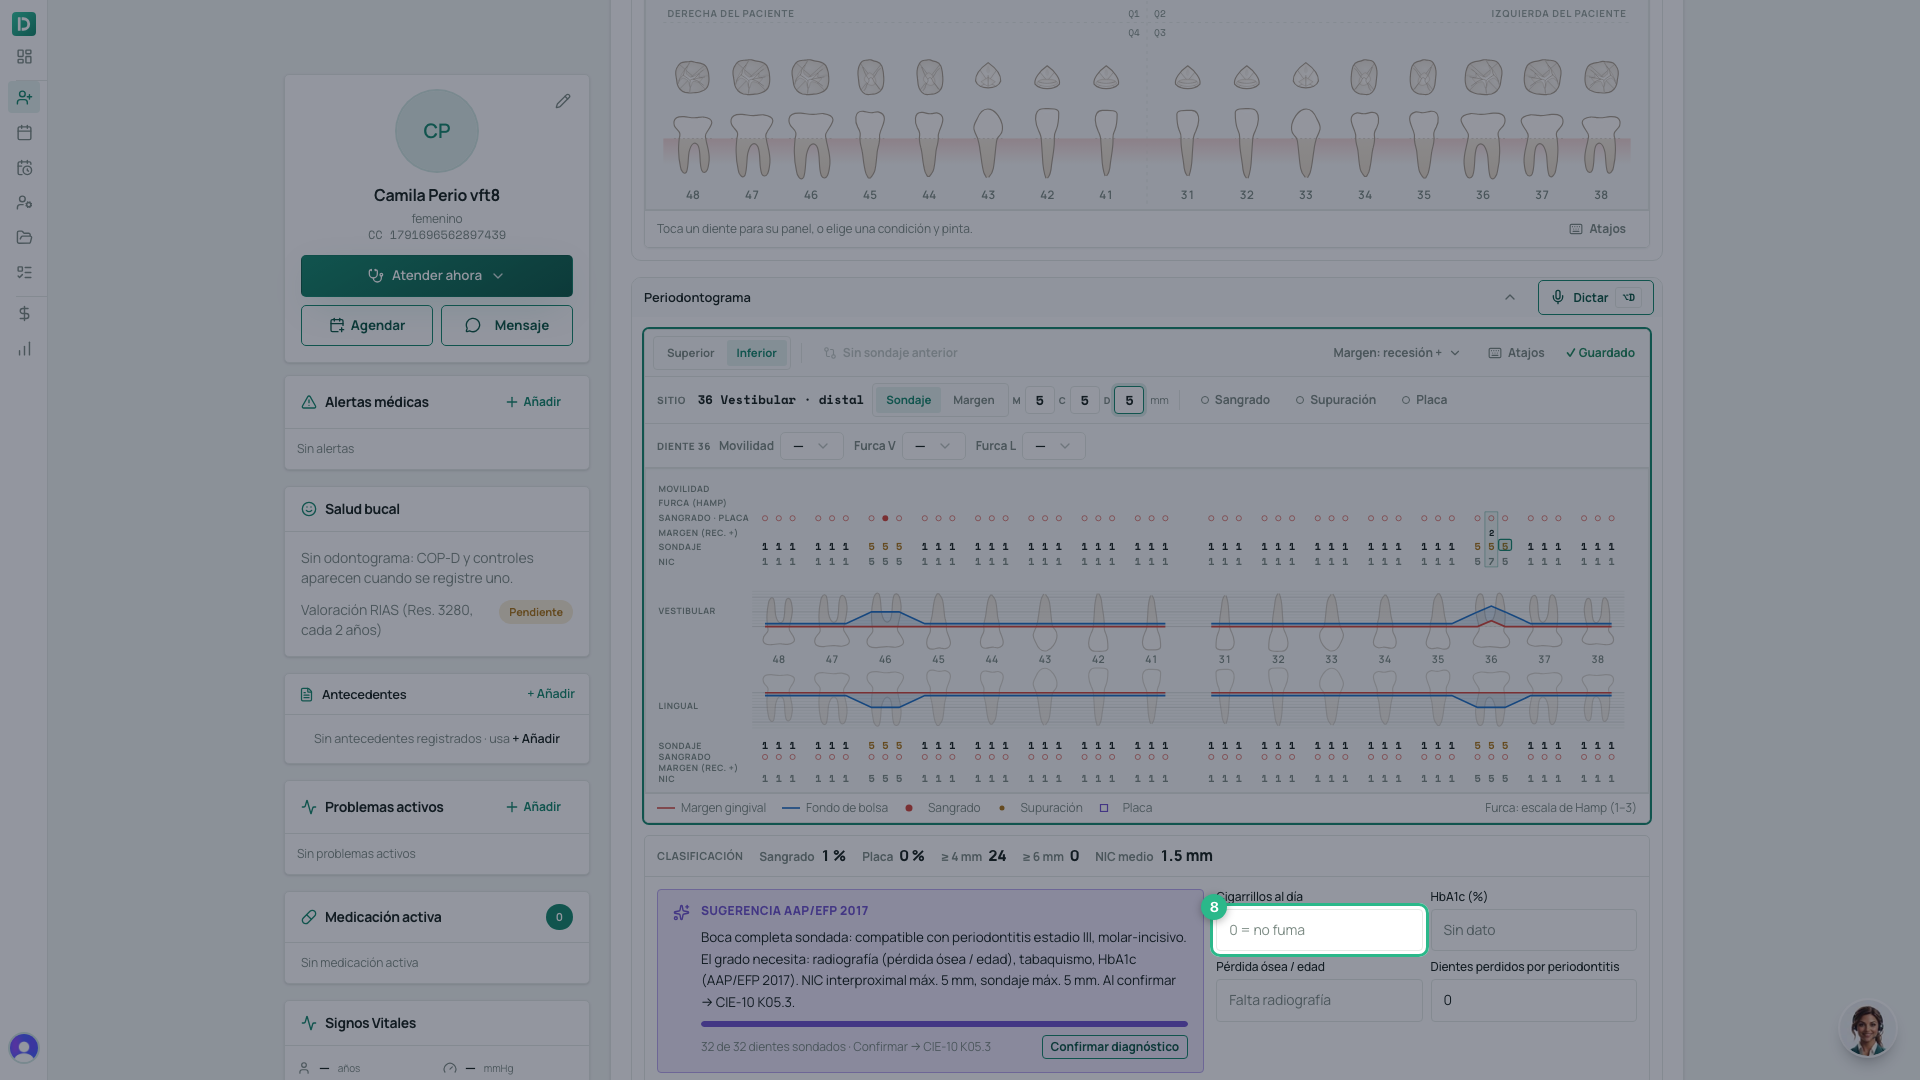
- With the mouth complete, the Clasificación box shows bleeding, plaque, the sites of 4 mm and 6 mm or more, and the AAP/EFP 2017 suggestion with its reasons.
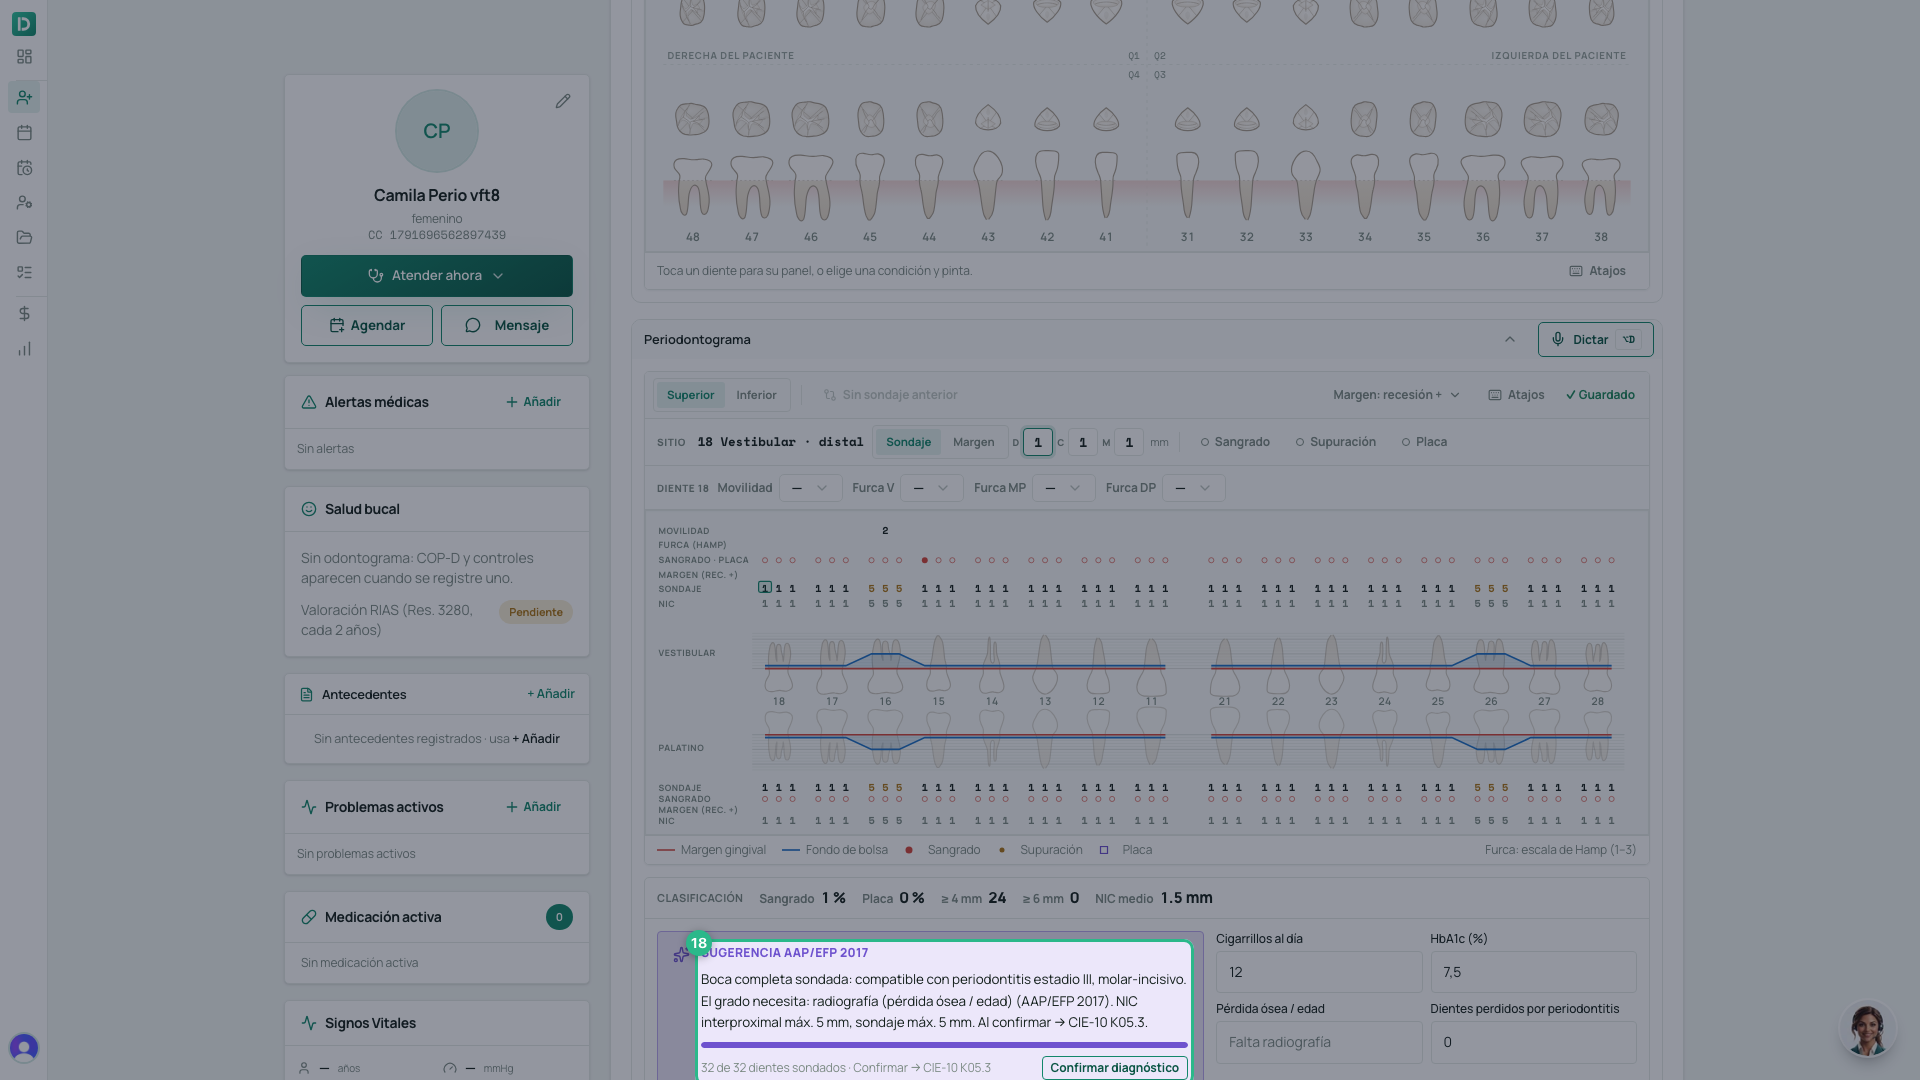
- Click Confirmar diagnóstico.
- Review Estadio, Extensión and Grado — the suggestion comes from the probing; the diagnosis is yours — and click Confirmar.
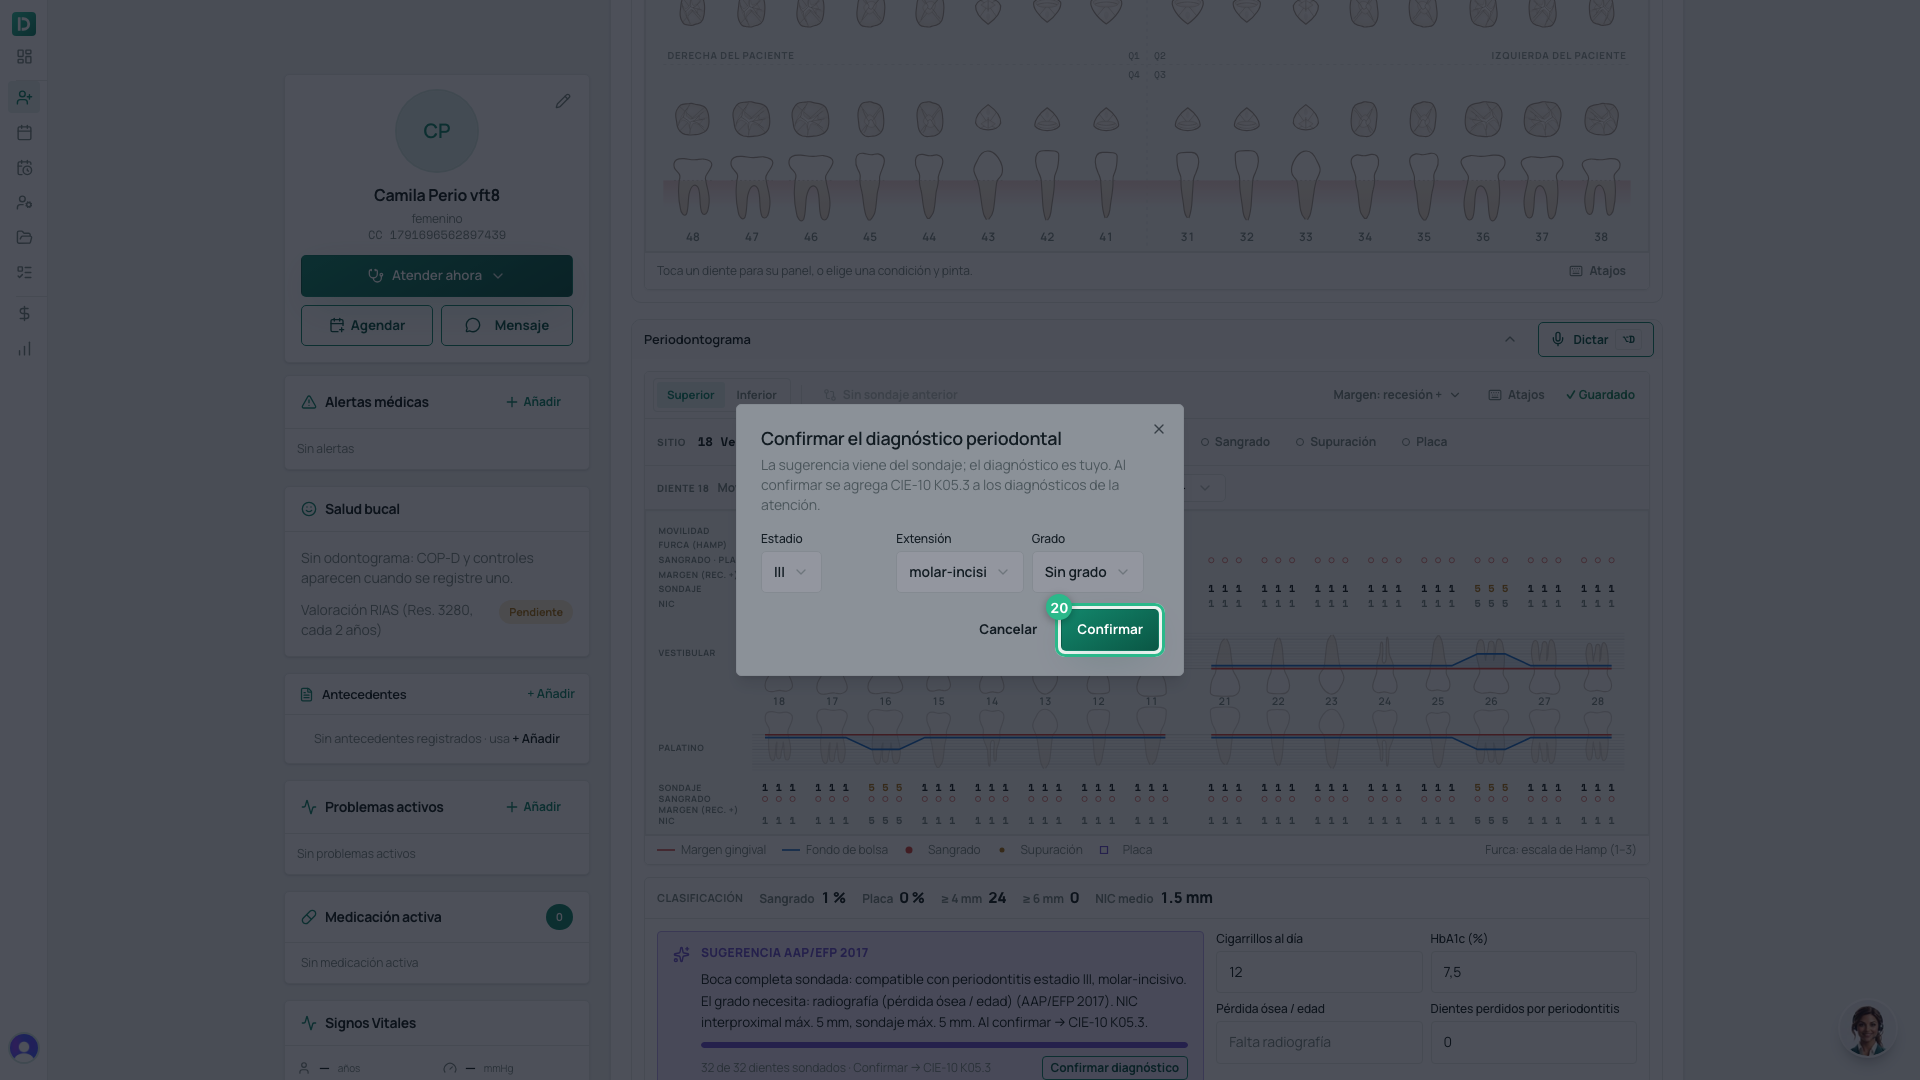
- The ICD-10 diagnosis K05.3 is added to the visit’s diagnoses.
A partial exam gets no suggestion: an unprobed site could be the worst one. If you change the probing after confirming, you will have to confirm again.
Probe by dictating
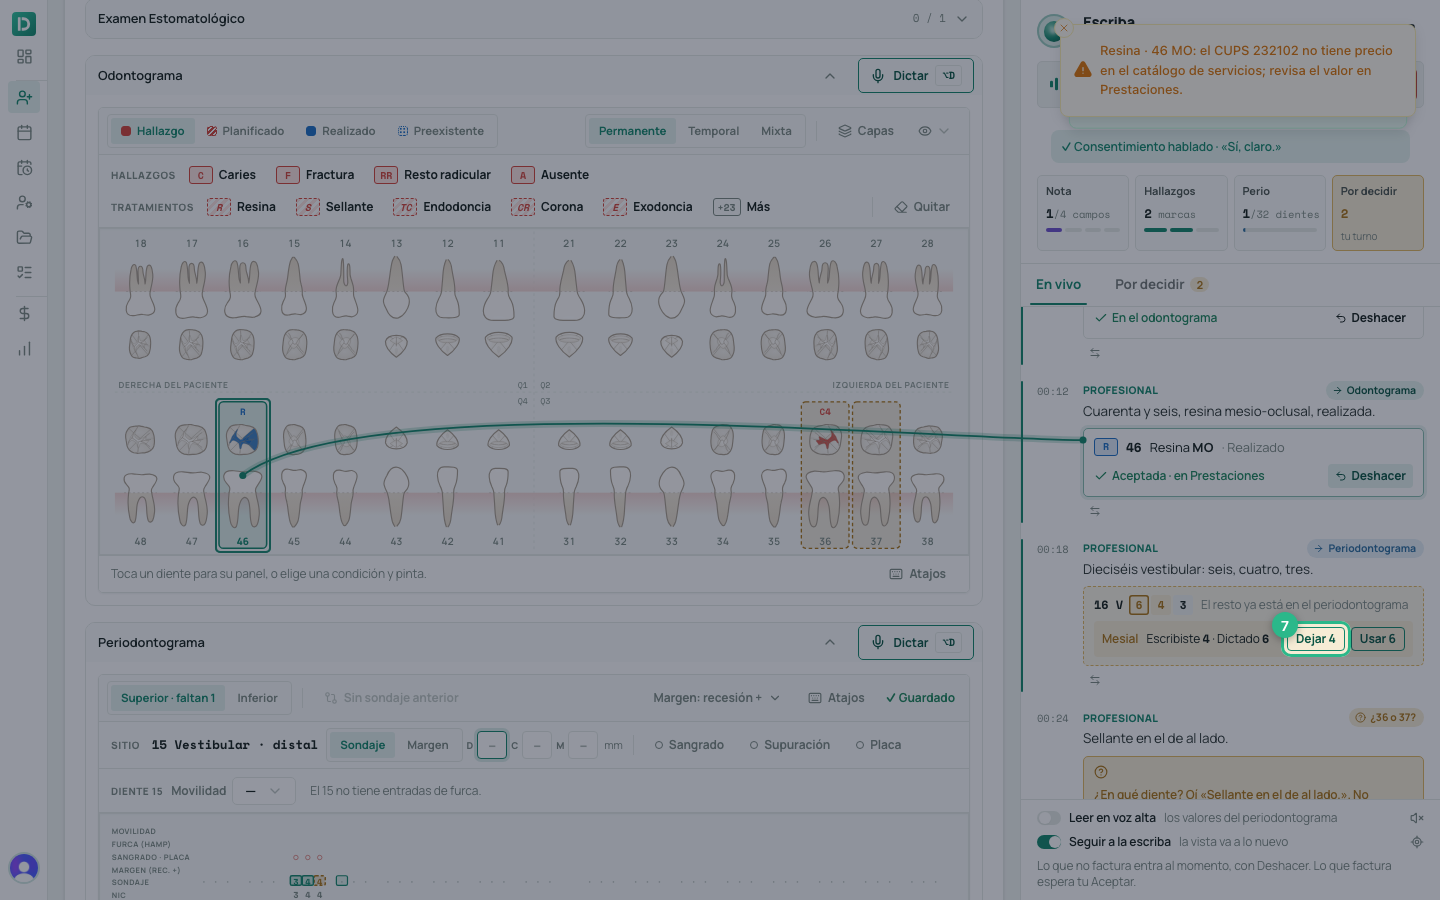
With the scribe on you can probe without putting the probe down: «dieciséis vestibular: seis, cuatro, tres» (16 buccal: 6, 4, 3) writes the three sites, and the dictated sites light up on the periodontal chart. Click Dictar in the section header (or ⌥D) to focus the scribe on the periodontal chart; without the scribe, it dictates only here, without recording the appointment.
- What you typed by hand is not overwritten. If you dictate a different value for that site, the scribe shows you both — Escribiste 4 · Dictado 6 — and you choose Dejar 4 or Usar 6. The other dictated sites do go in.
- «Sangrado distal» (distal bleeding), «movilidad dos» (mobility 2) or «furca grado uno» (grade 1 furcation) can be dictated too.
- Leer en voz alta (read aloud), at the bottom of the panel, reads back the values that went in, so you do not have to look at the screen.
How to start listening to the appointment and close it is in How to dictate and use the AI scribe.
Keyboard shortcuts
| Key | What it does |
|---|---|
0 to 9 | Probing depth, and the cursor moves on (⇧ + digit for 10–19) |
M | Switches between probing depth and margin (− for negative) |
S U P | Bleeding, suppuration and plaque on the last site |
| Enter | Next tooth |
⌫ | Corrects the previous site |
Tip
In the patient’s Odontograma tab, the Periodontograma view compares each probing with the previous one. How the margin is entered (positive or negative recession, the Bern convention) is chosen by the clinic in Ajustes → Odontología; it only changes how it is entered and displayed.